
You don't really need to calibrate the camera view. It is just an additional possibility. Every HyperviewCam has two camera modules, therefore in player and stitcher you need (only once) to vertically and horizontally adjust right video till both videos, left and right, overlap correctly.
In Videoplayer you can adjust overlapping of videos, but videoplayer has no correction of fish-eye distortion, because normal PC has not sufficient processing power to calculate undistortion in real time, means when dual HD video with 30 video frames per second is playing. Therefore is player playing videos in real time and stitcher needs few minutes, depending on your PC power, to export stitched 2xHD videos
Videostitcher application already contains default calibration parameters for removing fish-eye distortion and optimal overlapping of left and right video. You can use those parameters or you can download and import other parameter sets (as single zip file) or you can setup new parameters, save them and simply export all of them as one zip file too. After changing parameter value, you can establish default parameters by pressing "Reset" button.
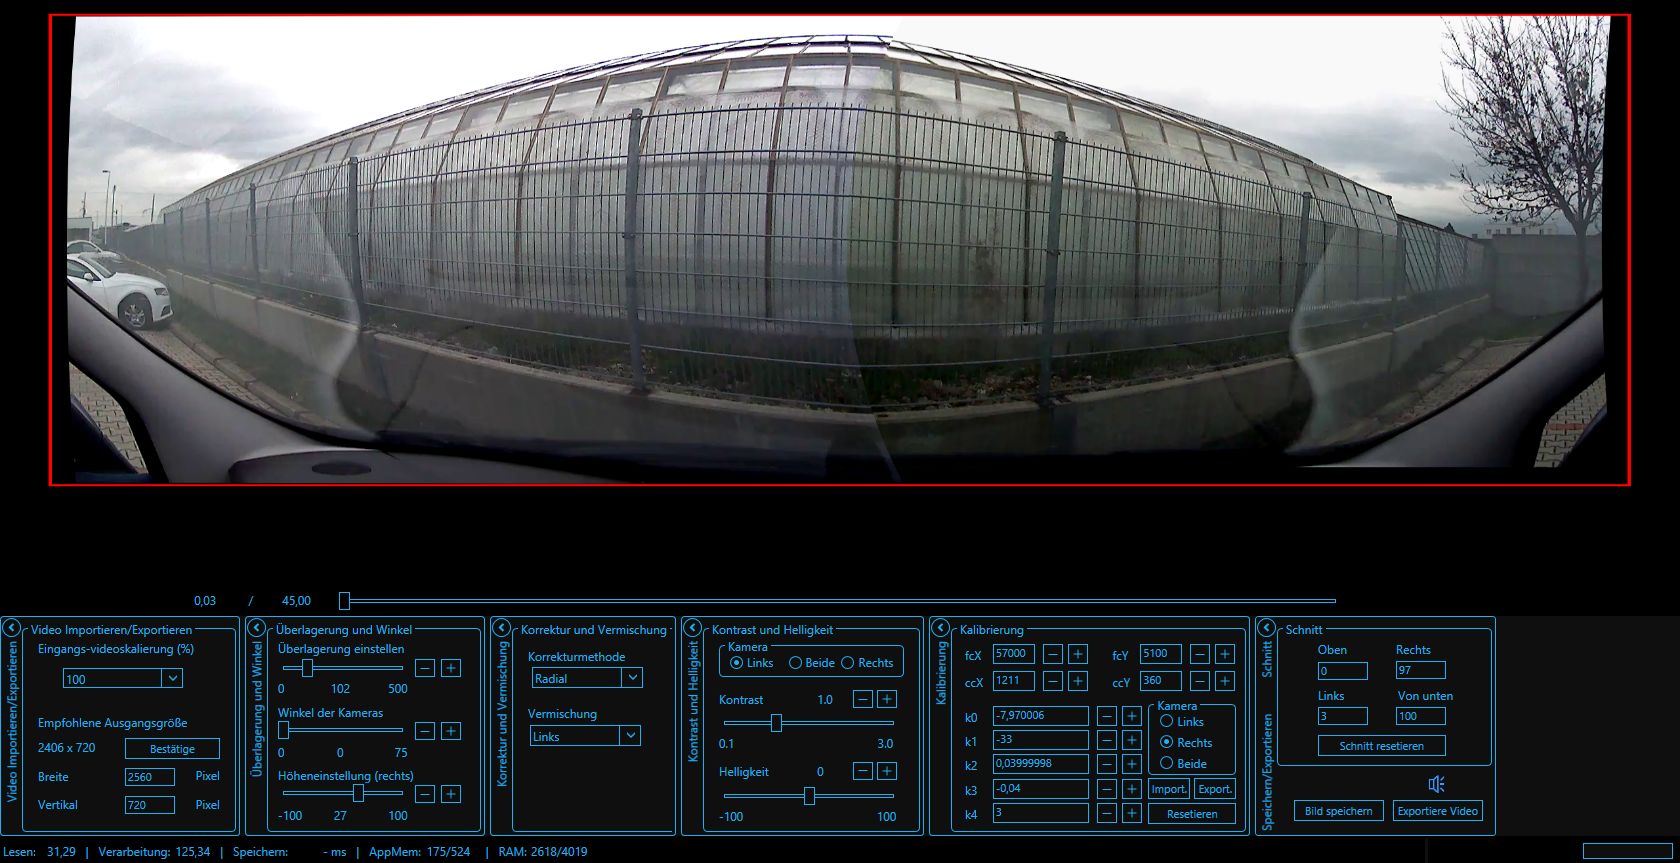
If you intend to find better parameters, then at first export factory standard parameters as zip file and save them as a backup, which you can always import back into stitcher, if you will be not happy with new parameters. To calibrate the camera, you need a suitable pattern. For example, a fence or building front with regular vertical and horizontal lines is well suited for it. See the image on the left showing one example.
The calibration parameters have the following meaning: - FCX and FCY are the focal length of the X and Y axis and have arbitrary units. - CCX and CCY are the centers of the videos in the X- and Y-axis. - k0 till k4 are the coefficients of the polynom used to calculate the radial distortion correction and its effects are best visible by clicking on "+" and "-".
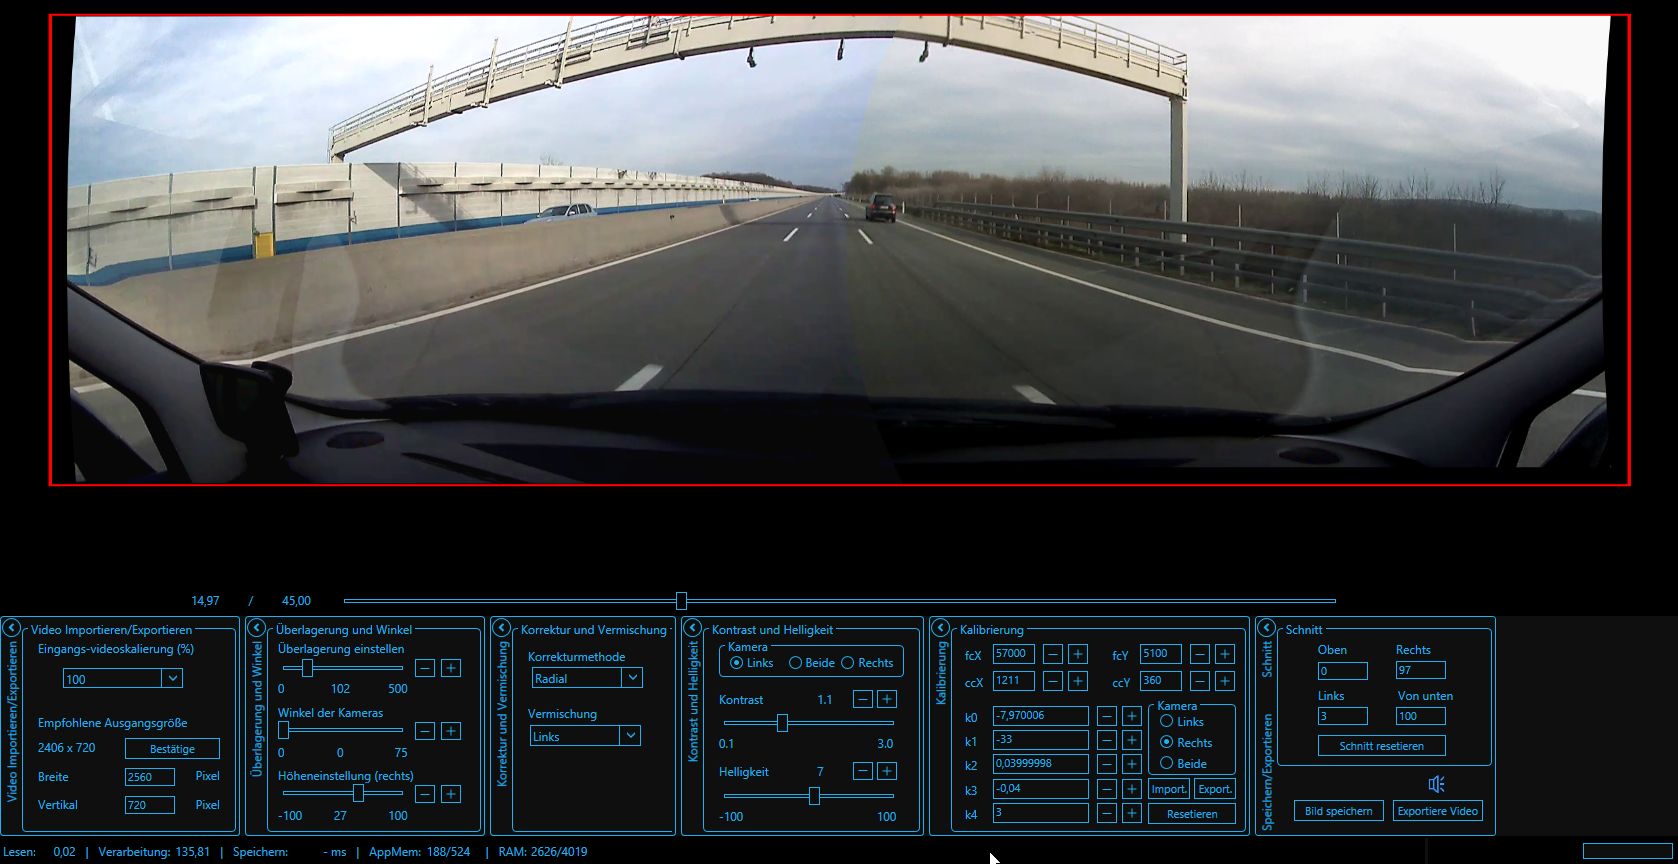
After clicking on each parameter name (e.g. "k1"), respective green box opens, where you can put a delta or increment/decrement (for example, 0.1 or 0.5) to define change step for "+" or "-". For calibration use input video scaling 100% (in Stitcher, is in the first left rectangle). To calibrate the camera, open a video showing pattern and change the parameters until the overlap becomes satisfactory. Then test the parameters with one normal street video.
When happy with new parameters for video scalling 100%, make right-mouse-click on "Reset" button, then new 100% scalling parameters will propagate to scallings 75%, 50% and 25%. So you will get new default parameters for all scallings. Now press "Export" button to export those parameters as zip file and save them as backup. If unhappy with new parametes, press "Import" button and import zip file with factory standard parameters.